一步一步熟悉Mac app开发(四)之ArrayController
#概要
本文分为两个阶段。
阶段一,实现数据的增、删。
阶段二,实现数据的绑定,对绑定的数据增、删。
#阶段一
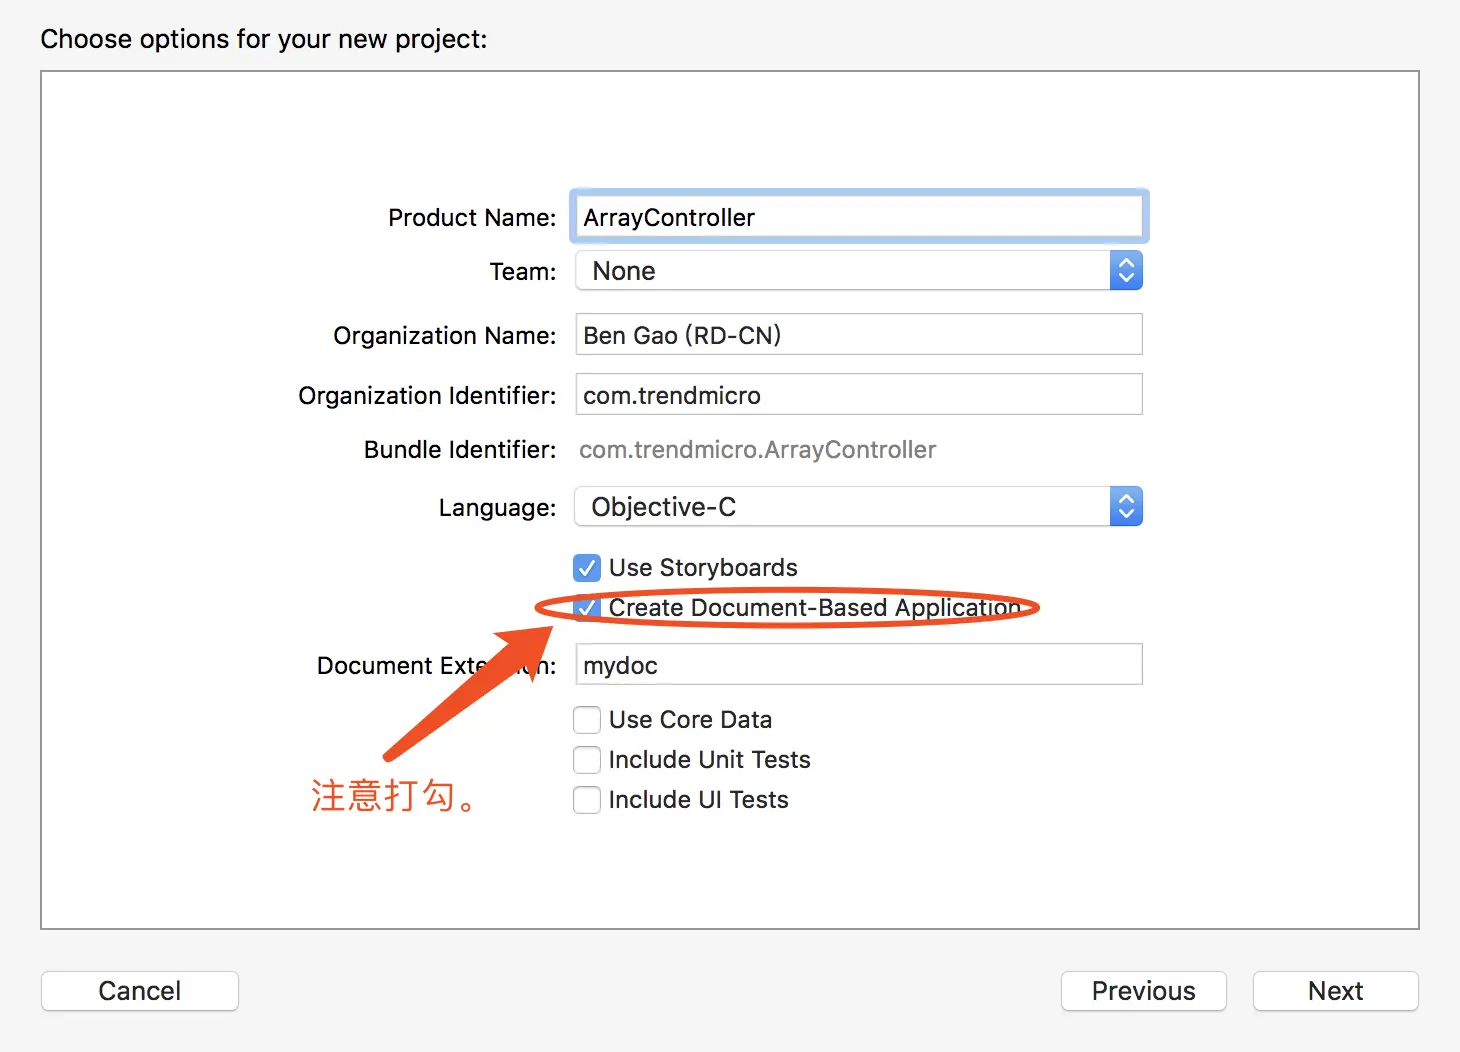
1.新建项目。
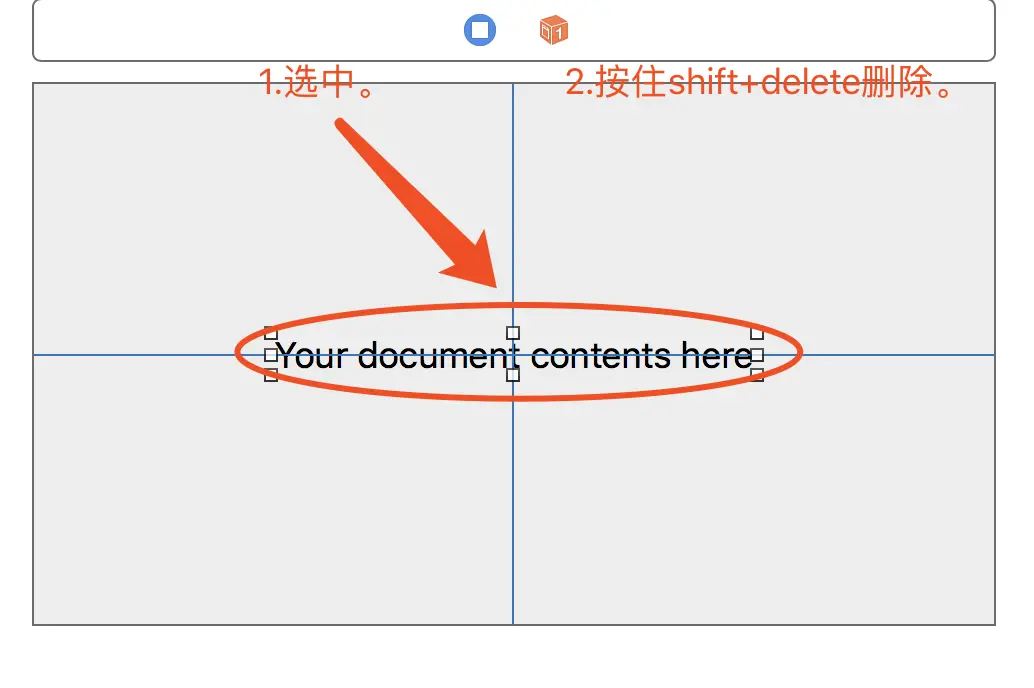
2.删除不必要的标签。
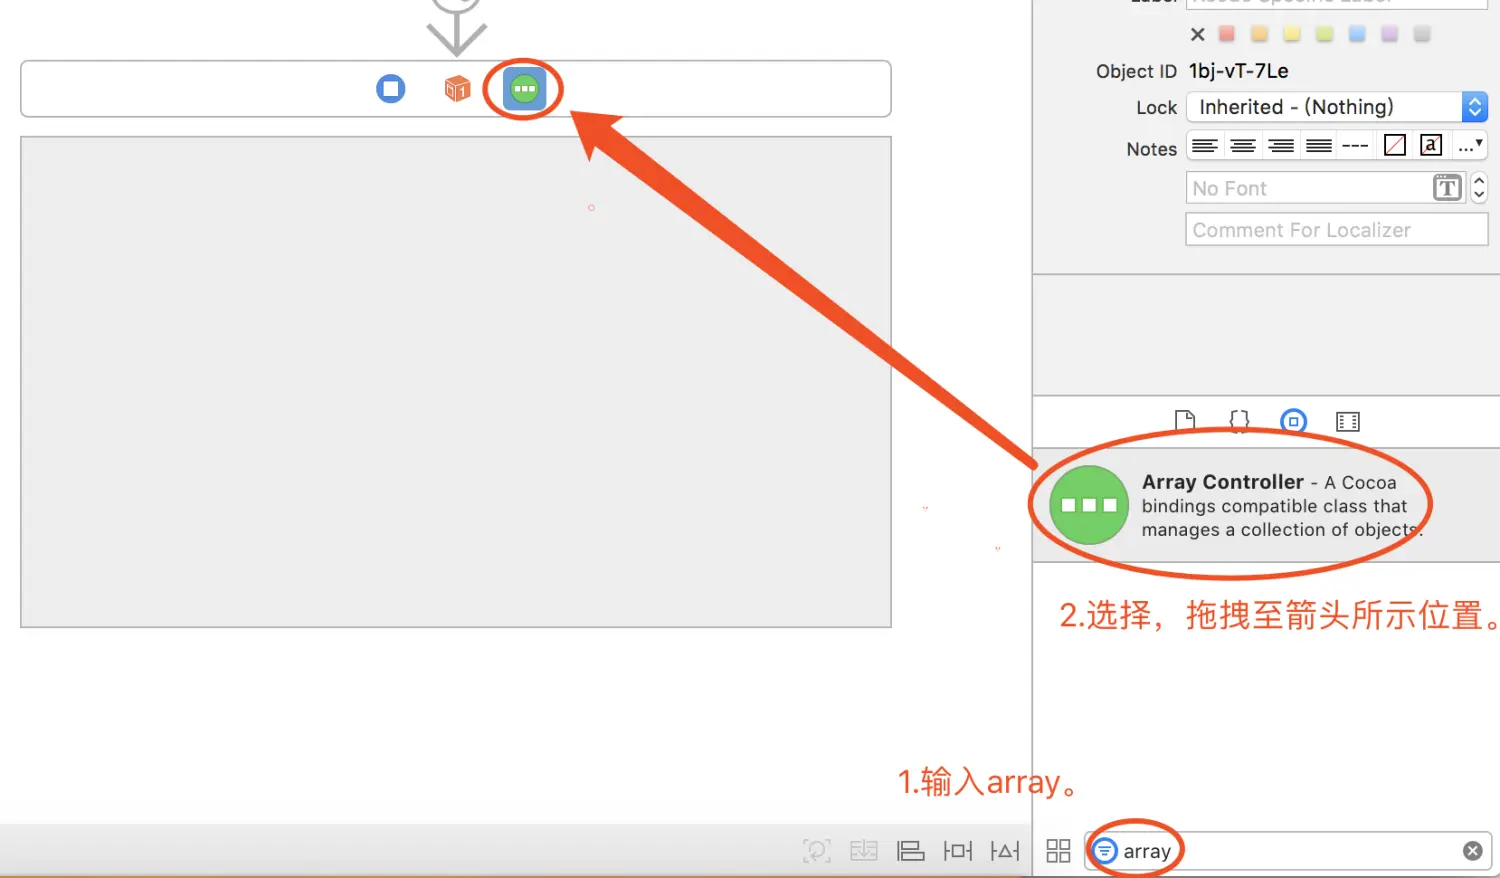
3.添加array controller至默认的view controller中。
4.创建一个NSObject的子类,命名为Song,添加两个属性,并设置其初始化方法。(不会的,请参考上篇文章。)
//Song.h
#import <Foundation/Foundation.h>

@interface Song : NSObject

@property NSString *name;
@property NSInteger bpm;

@end
//Song.m
#import "Song.h"

@implementation Song

- (id) init{
    self = [super init];
    if(self){
        _name = @"New Song";
        _bpm = 100;
    }
    return self;
}

@end
5.在Document.h中添加songs成员,并在Document.m中对songs进行初始化。
//Document.m(节约内存/流量,仅放核心代码)
#import "Song.h"
@interface Document ()
@property NSMutableArray *songs;
@end

- (instancetype)init {
    self = [super init];
    if (self) {
        // Add your subclass-specific initialization here.
        _songs =[[NSMutableArray alloc] initWithCapacity:64];
        [_songs addObject:[Song new]];
    }
    return self;
}
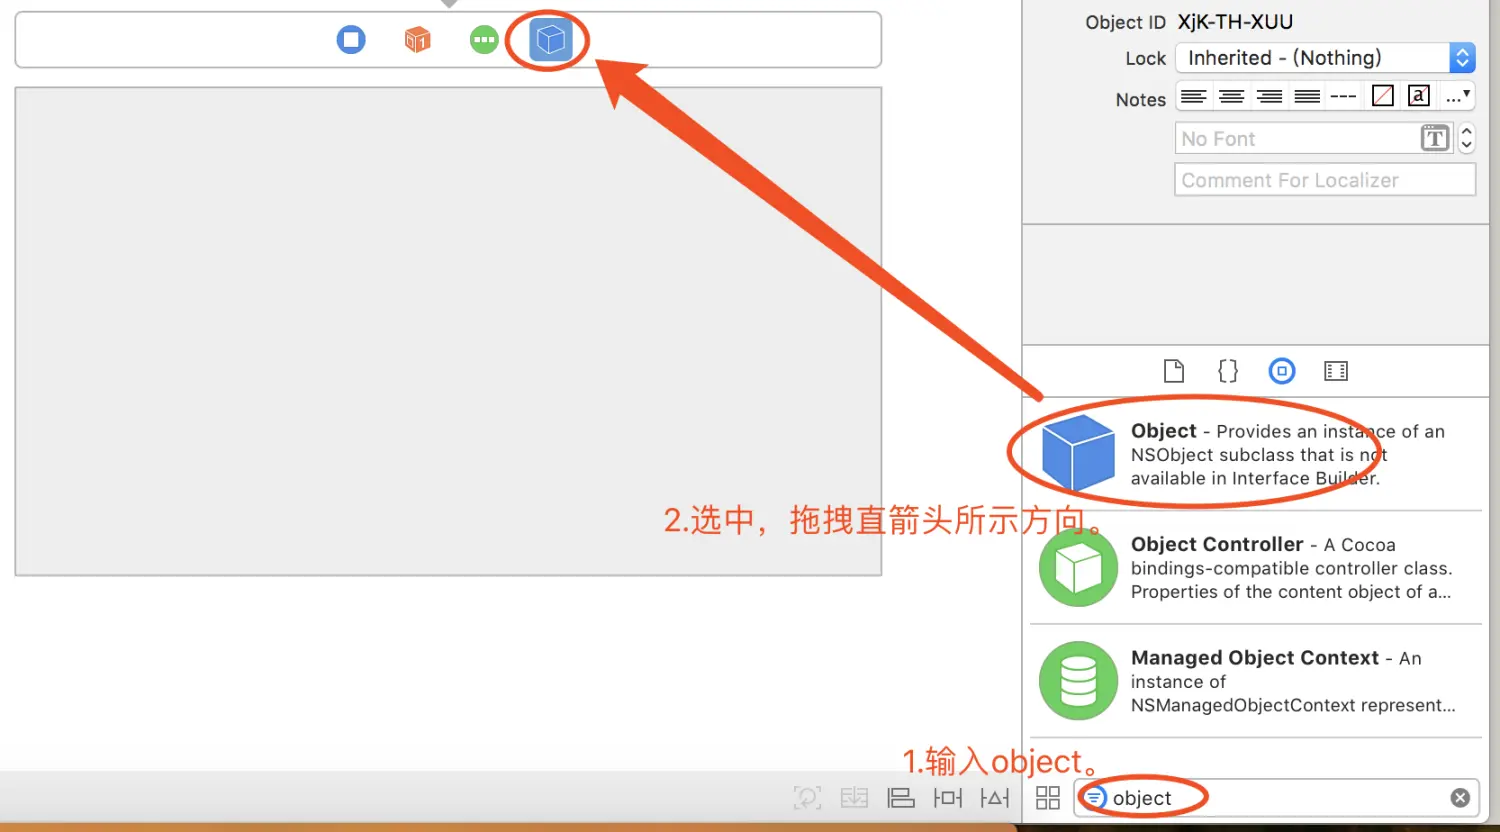
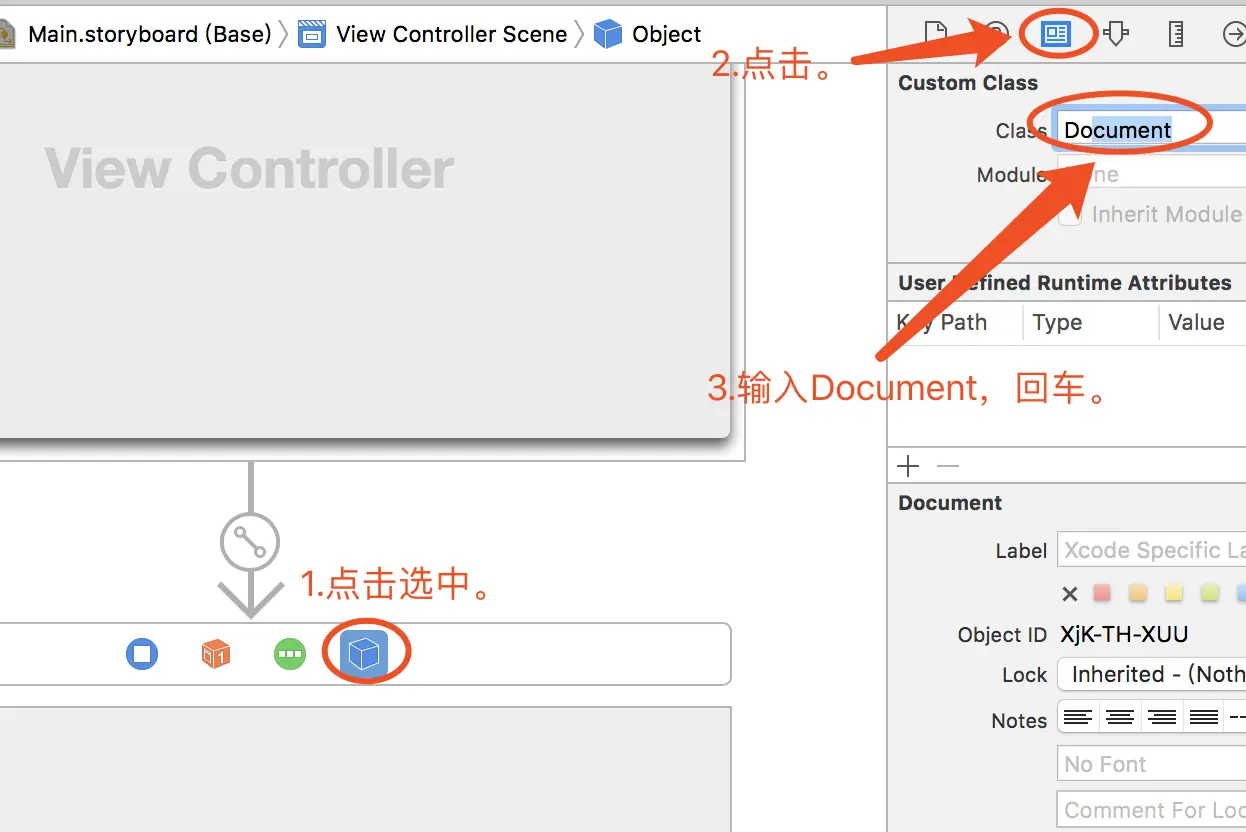
6.回到storyboard,添加object至默认的view controller中,并且设置其Custom Class为“Document”。
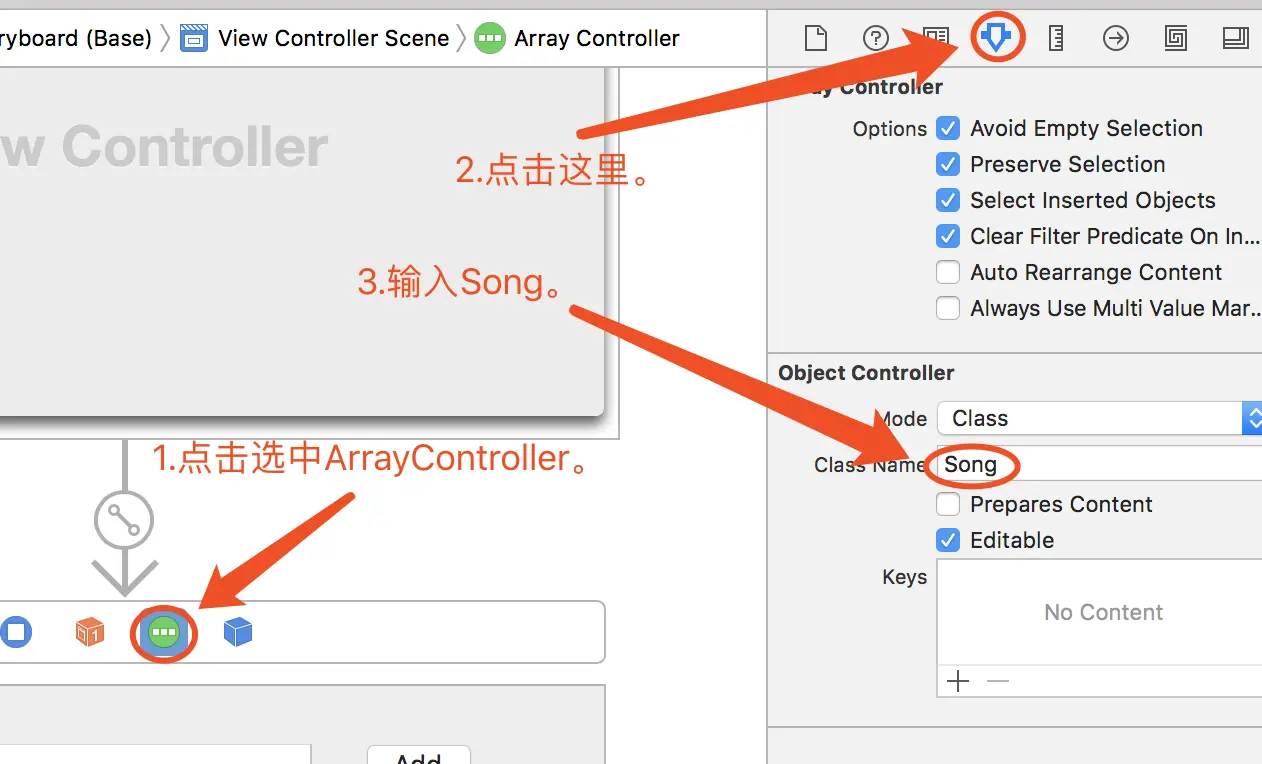
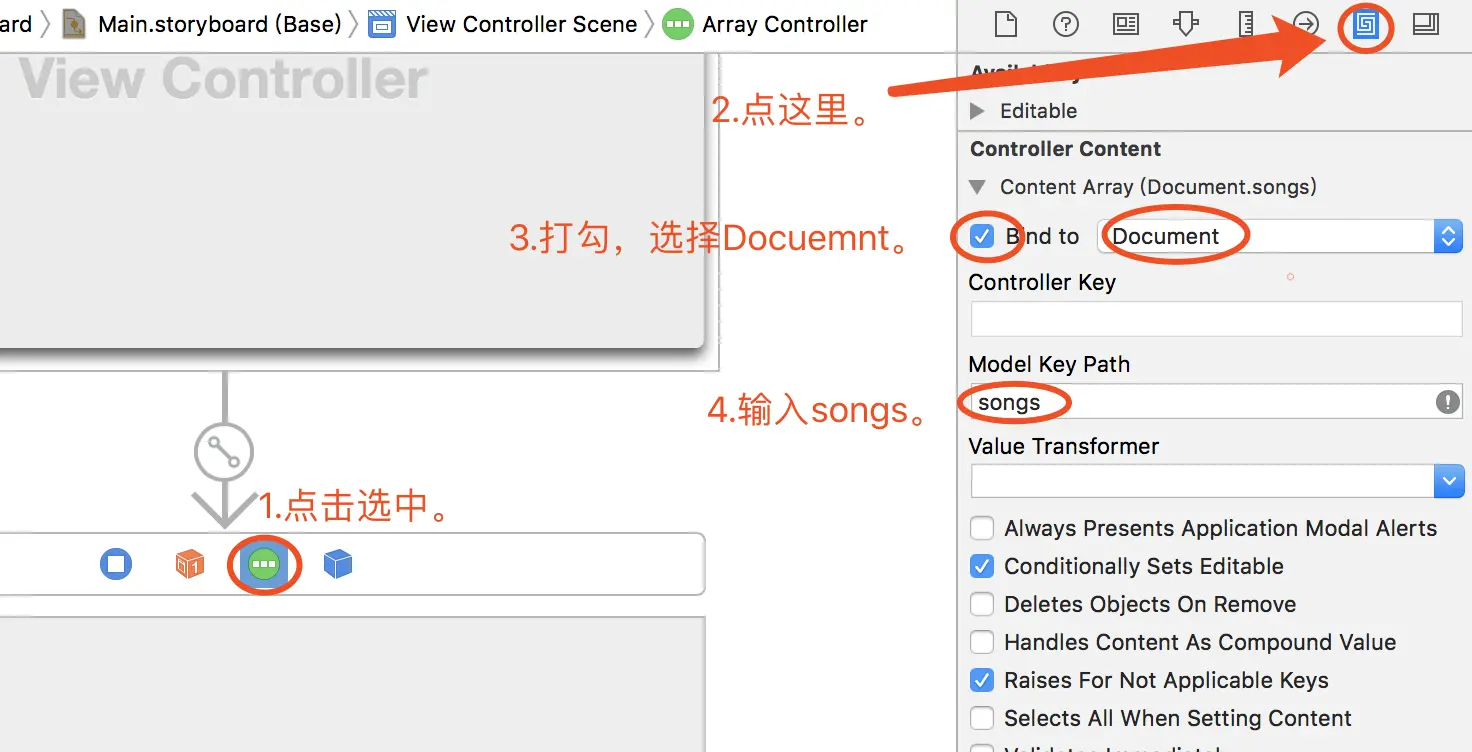
7.设置array controller的设置ArrayController的【Object Controller】中【Class Name】为Song,然后设置【Content Array】绑定为Docuemnt,并且设置其【Model Key Path】为songs。
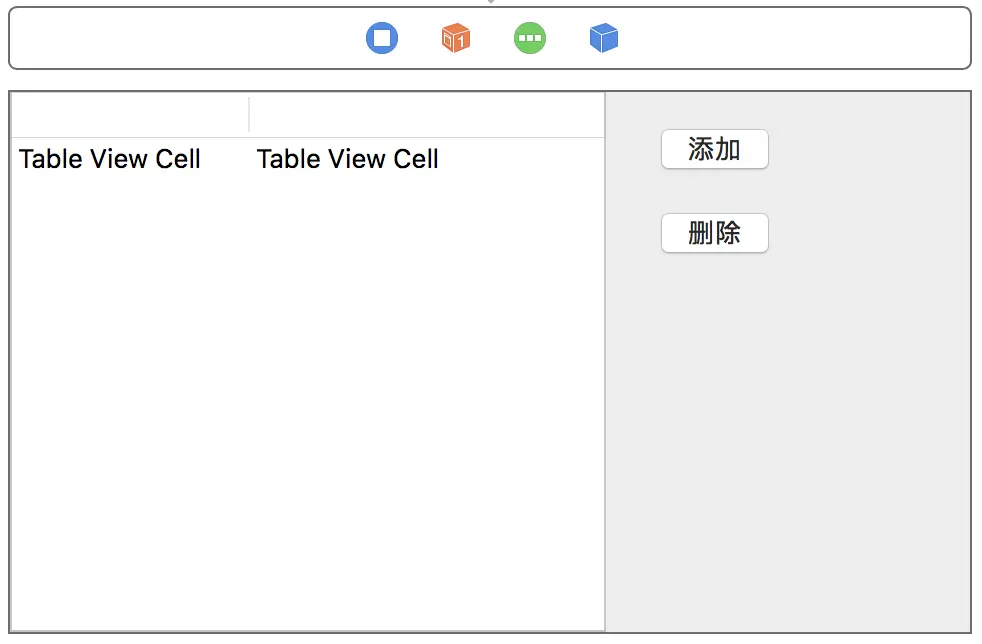
8.添加一个TableView和两个按钮,布局如下。
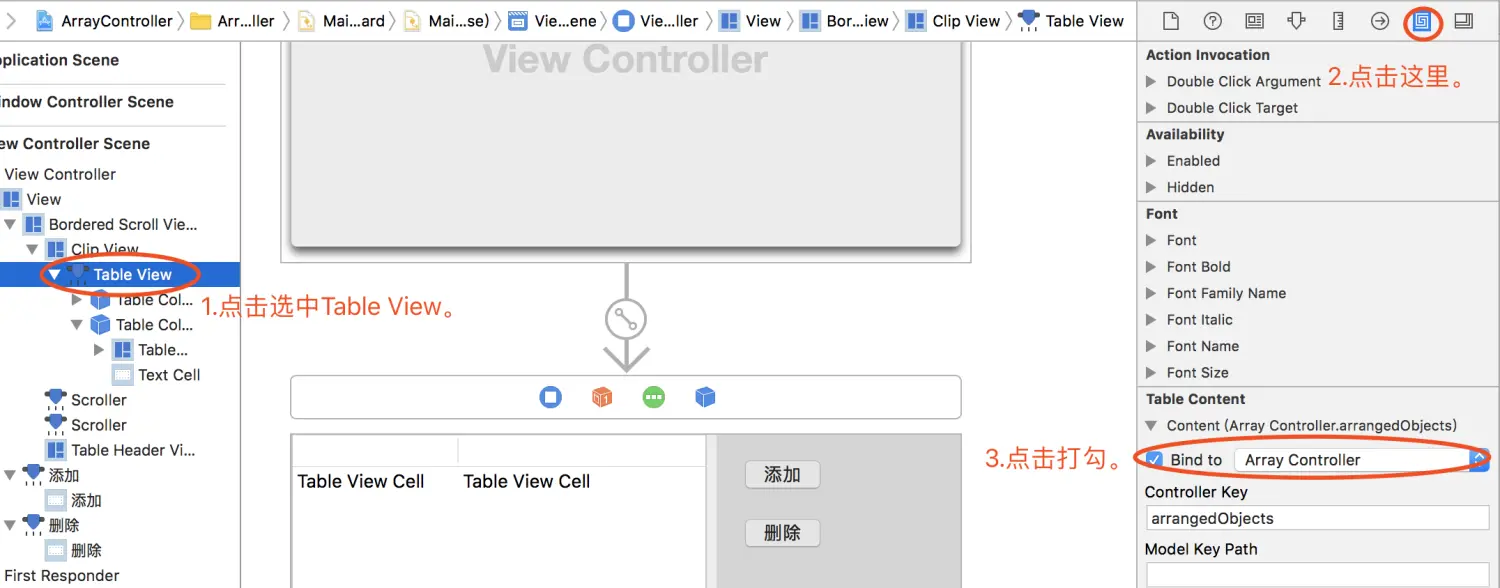
9.将TableView绑定于Array Controller。
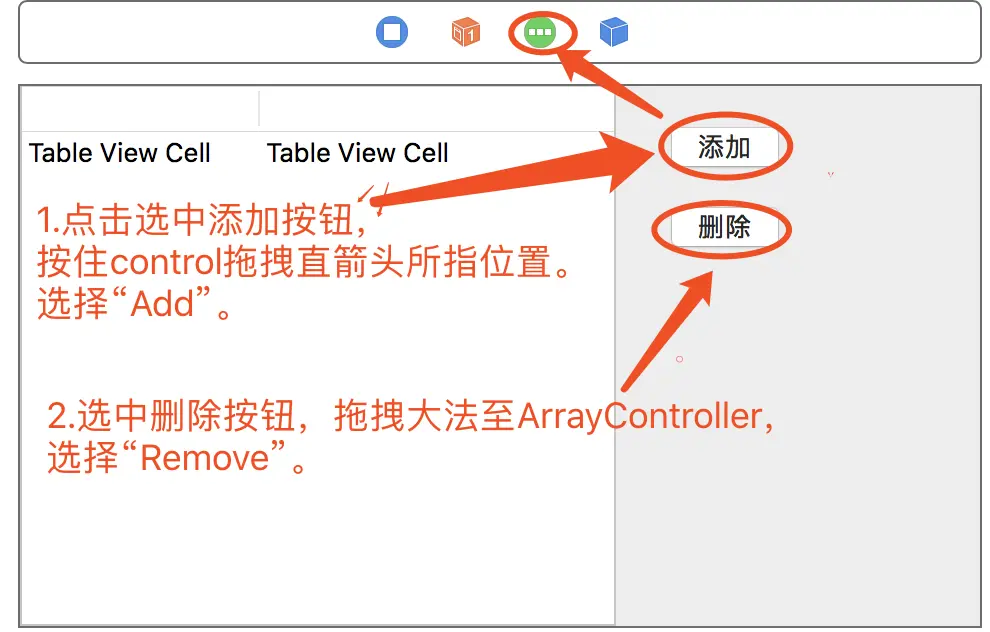
10.将两个按钮与Array Controller的add和reomve方法绑定起来。
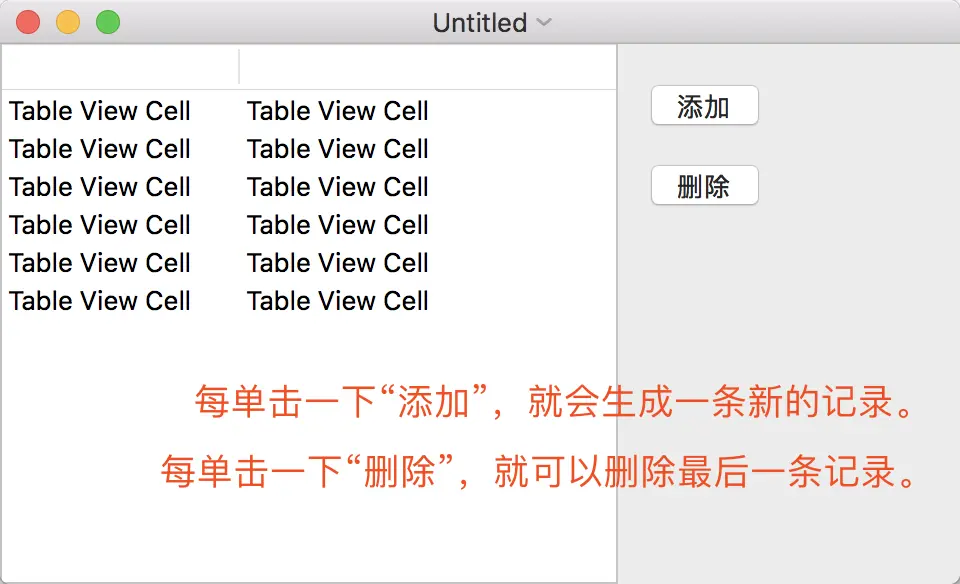
11.阶段一完成,效果如下。
#阶段二 绑定数据
1.绑定第一列、第二列到name和bpm属性上。
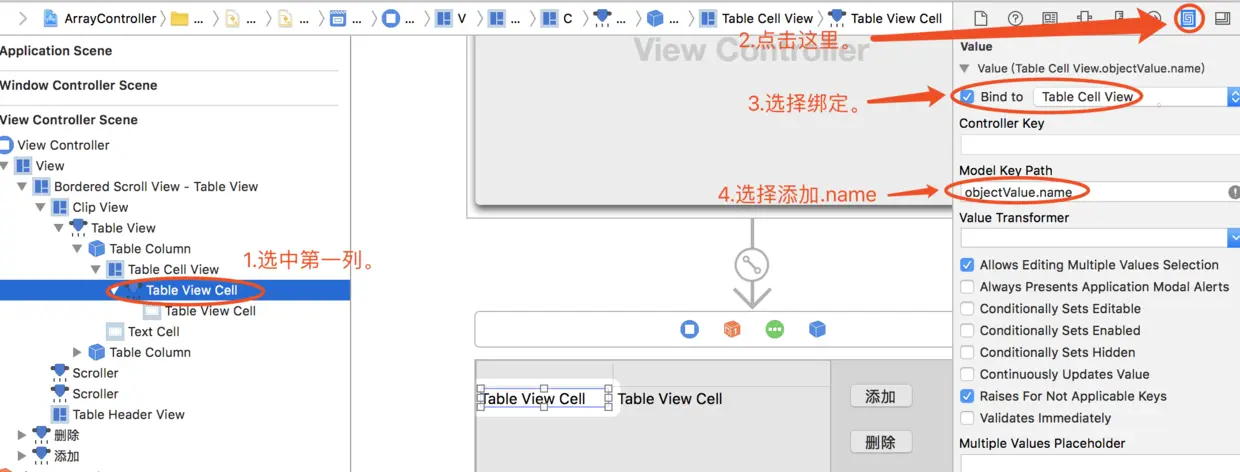

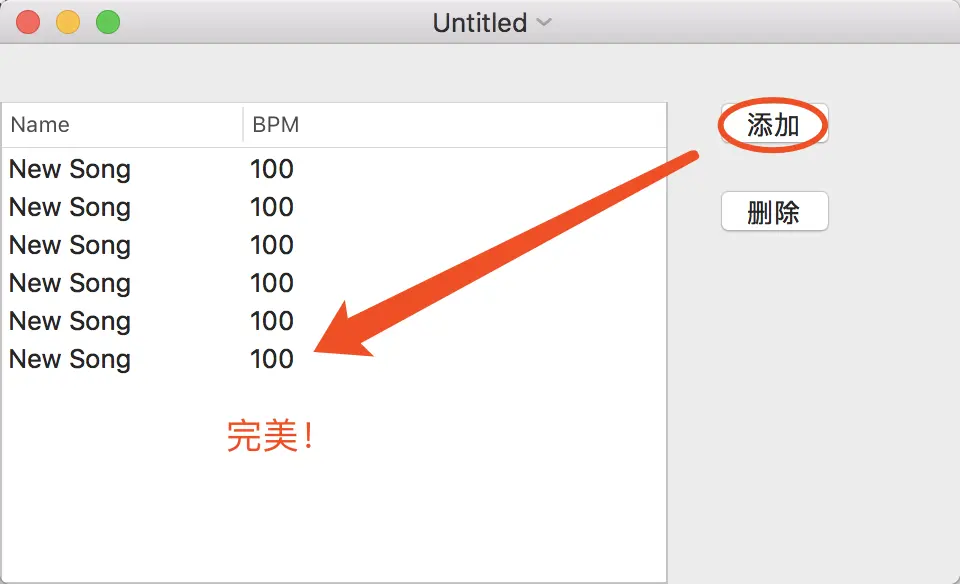
2.完成,效果如下。
#复习
可以根据以下项目来复习使用ArrayController。
一步一步熟悉Mac app开发(十)之Cocoa Binding