概要
阶段一、再次实现简单的Popover Demo。
阶段二、熟悉NSNotificationCenter中UserInfo参数传递。
#阶段一
1、新建工程,在默认的View Controller中加入一个按钮。
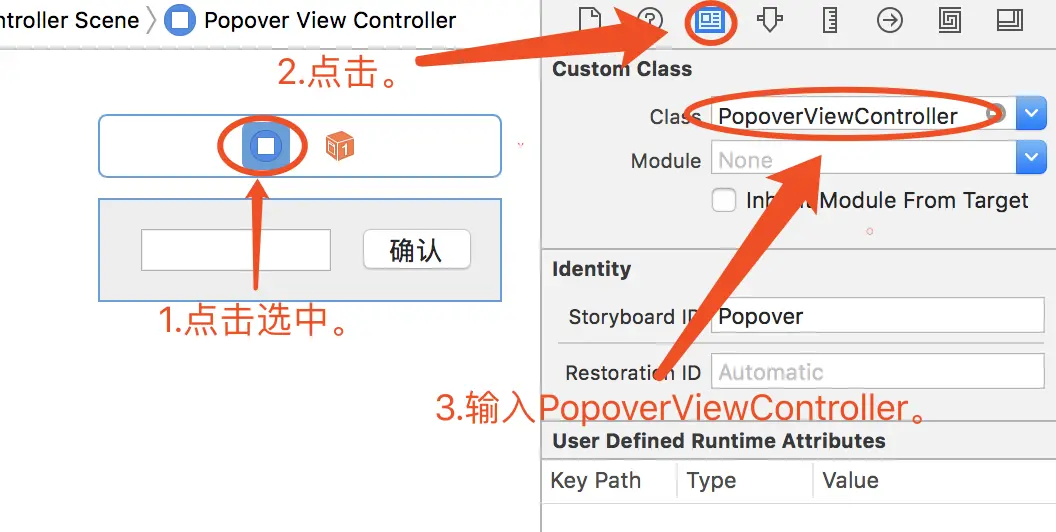
2、添加一个新的View Controller,并设置其大小为200*50。

3、设置其StoryBoard ID为“Popover”。
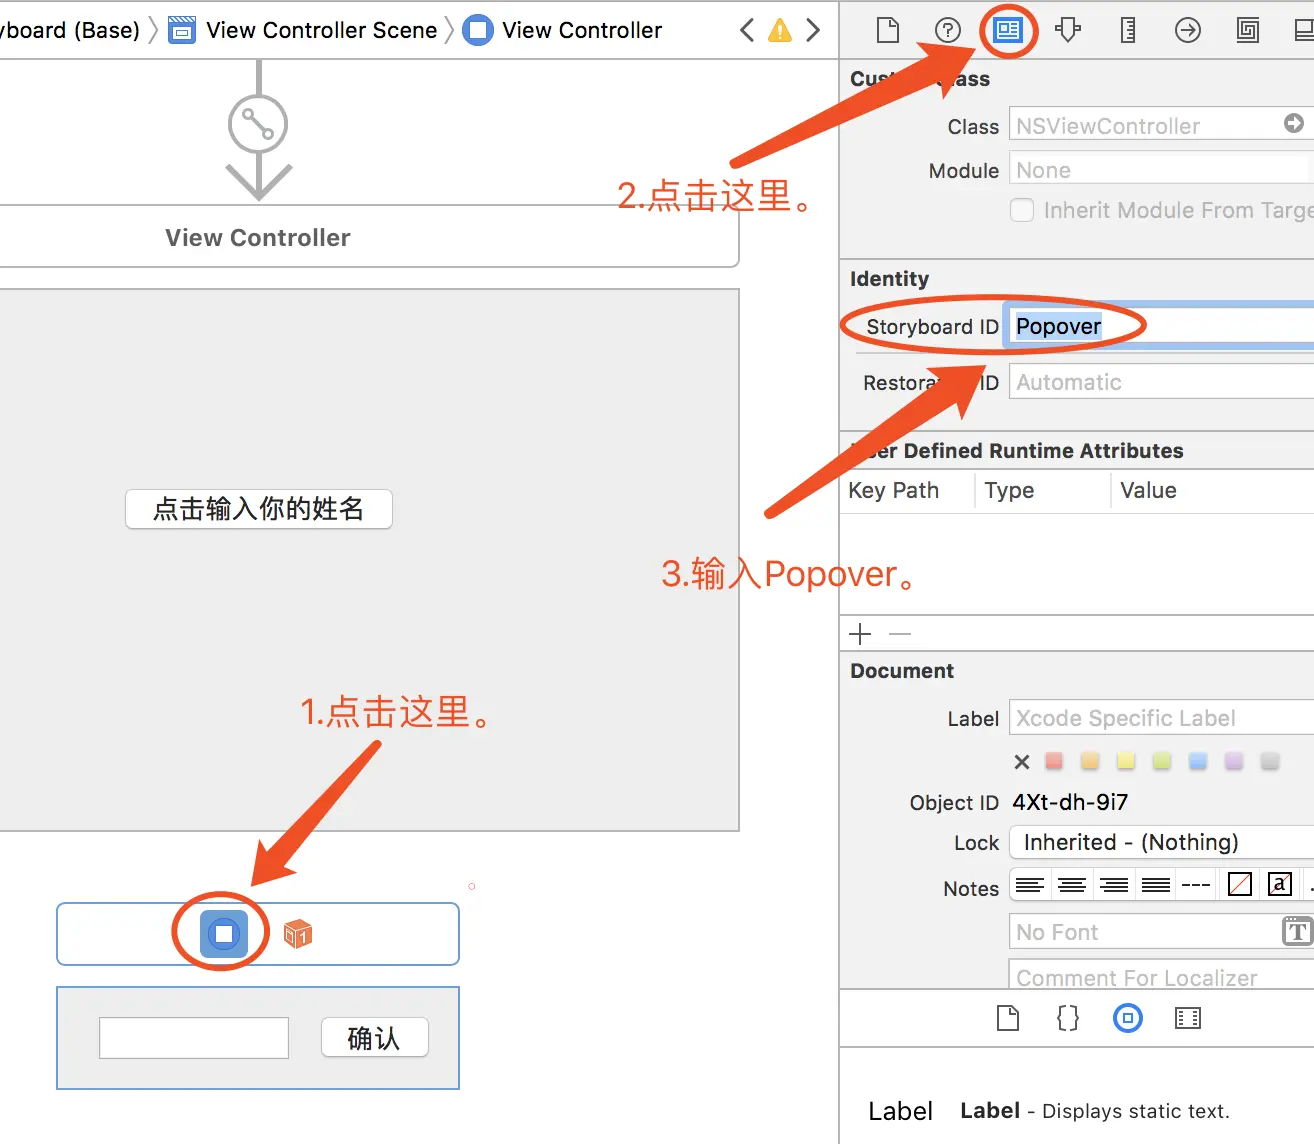
4、将“点击输入你的姓名”按钮,拖拽大法至ViewController.m内。
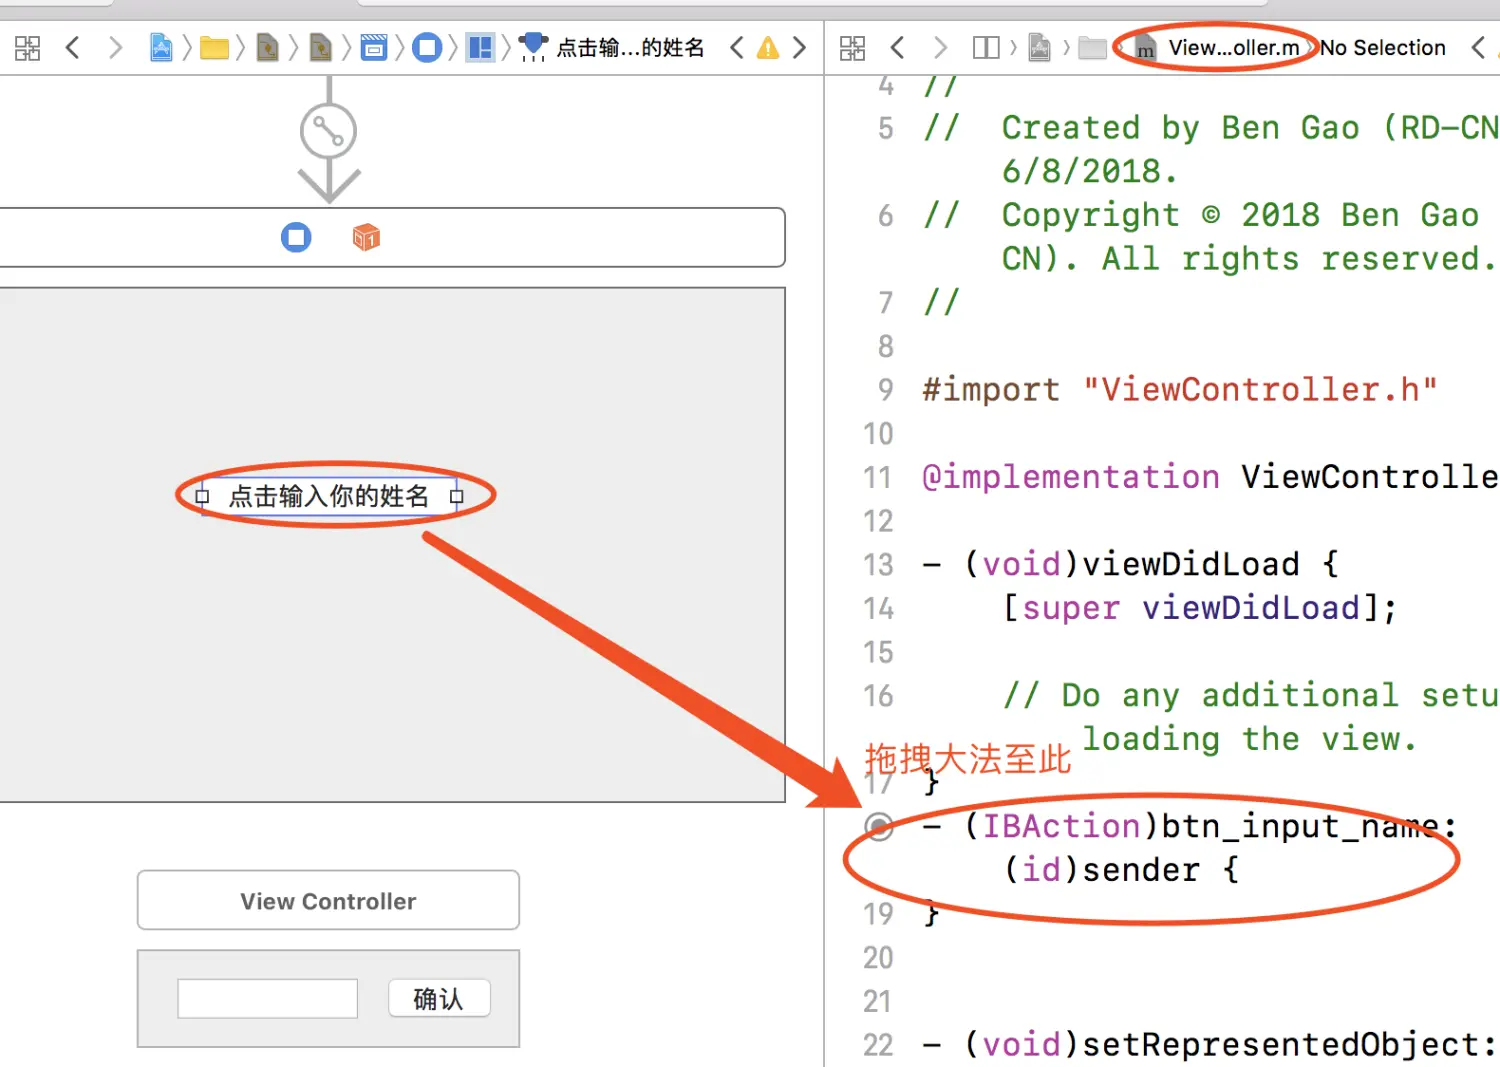

5、btn_input_name按钮的代码如下:
1
2
3
4
5
6
7
| - (IBAction)btn_input_name:(id)sender {
NSViewController* vc = [[NSStoryboard storyboardWithName:@"Main" bundle:nil] instantiateControllerWithIdentifier:@"Popover"];
NSPopover *popover = [[NSPopover alloc] init];
popover.contentViewController = vc;
popover.behavior = NSPopoverBehaviorTransient; //自动关闭popover
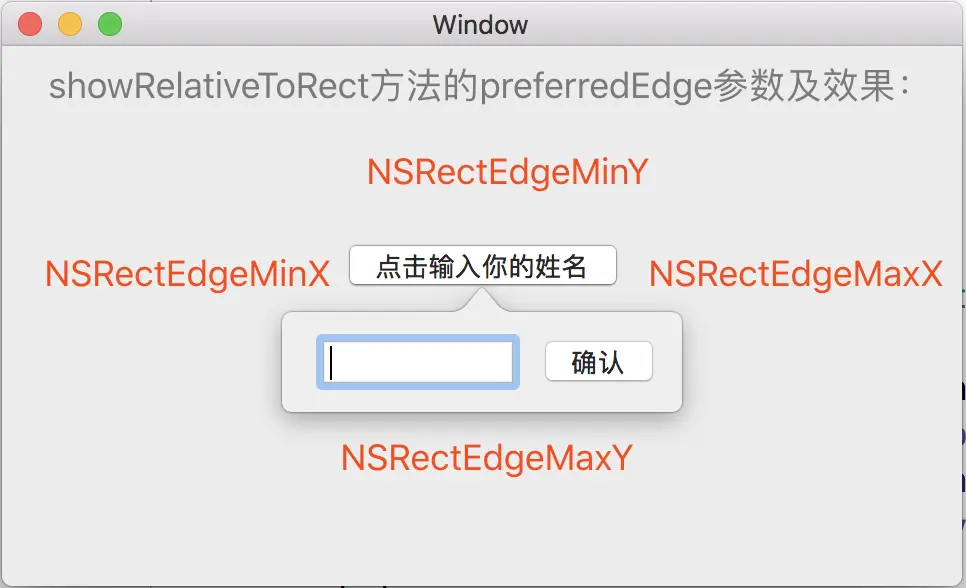
[popover showRelativeToRect:_btn_input_name.bounds ofView:_btn_input_name preferredEdge:NSRectEdgeMaxY];
}
|
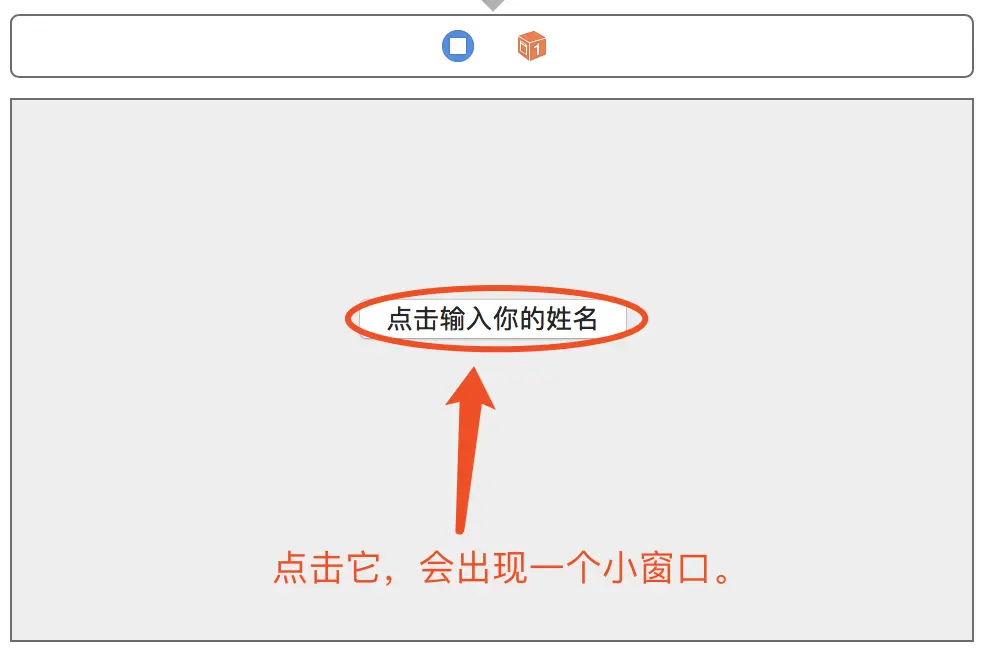
6、阶段一完成,效果如下。
#阶段二
1、创建一个NSViewController的子类“PopoverViewController”,并且设置"Popover"的Custom Class为“PopoverViewController”。
2、拖拽大法,将“确认”按钮拖拽至PopoverViewController中。
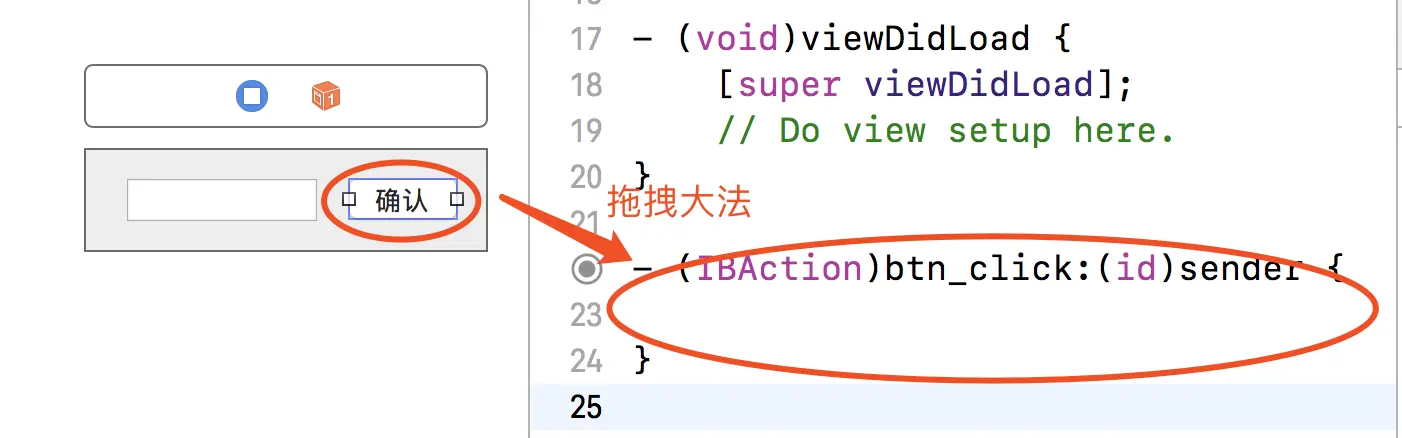
3、添加代码。
1
2
3
4
5
| - (IBAction)btn_click:(id)sender {
NSNotificationCenter* nc = [NSNotificationCenter defaultCenter];
NSString *name = _text_name.stringValue;
[nc postNotificationName:@"click" object:self userInfo:@{@"name":name}];
}
|
4、在ViewController.m中添加代码。
1
2
3
4
5
6
7
8
9
10
11
12
13
14
15
16
17
| - (void)viewDidLoad {
[super viewDidLoad];
// Do any additional setup after loading the view.
NSNotificationCenter *nc = [NSNotificationCenter defaultCenter];
[nc addObserver:self selector:@selector(sayHi:) name:@"click" object:nil];
}
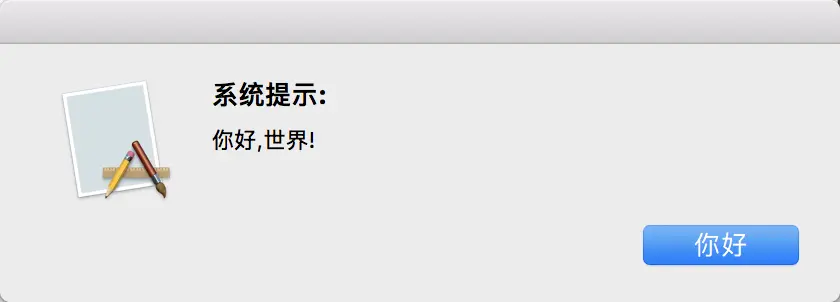
-(void) sayHi:(NSNotification *)nc{
NSAlert *alert = [[NSAlert alloc] init];
NSString*name = nc.userInfo[@"name"];
alert.messageText = @"系统提示:";
alert.informativeText = [NSString stringWithFormat:@"你好,%@!",name];
[alert addButtonWithTitle:@"你好"];
[alert runModal];
}
|
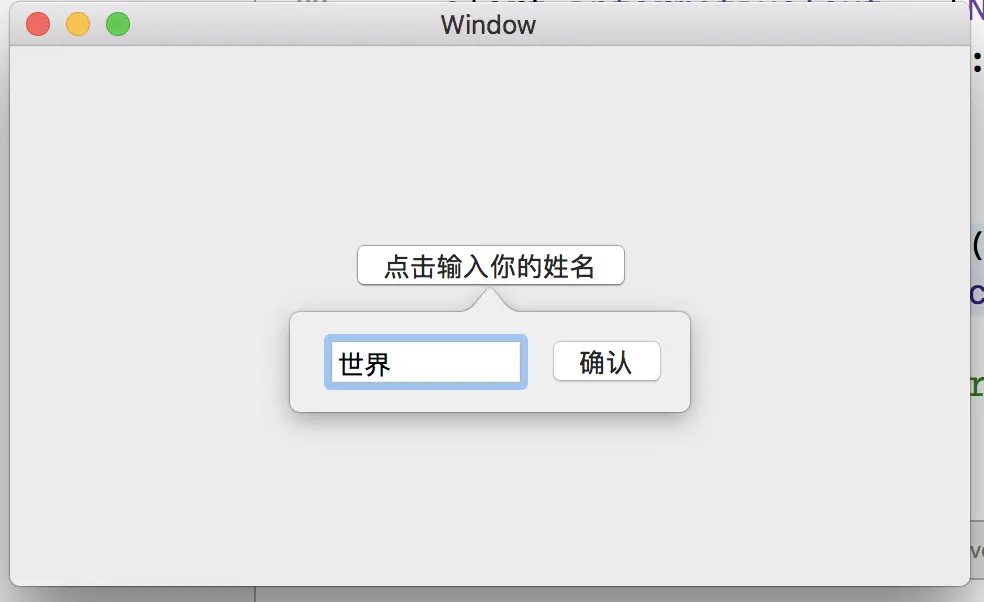
5、阶段二完成,效果如下。