#概要
本文主要介绍如何通过NSNotification来实现两个container view之间的数据的交互。
#步骤
1、新建项目,打开storyboard,拖拽两个container view至默认的view controller中。
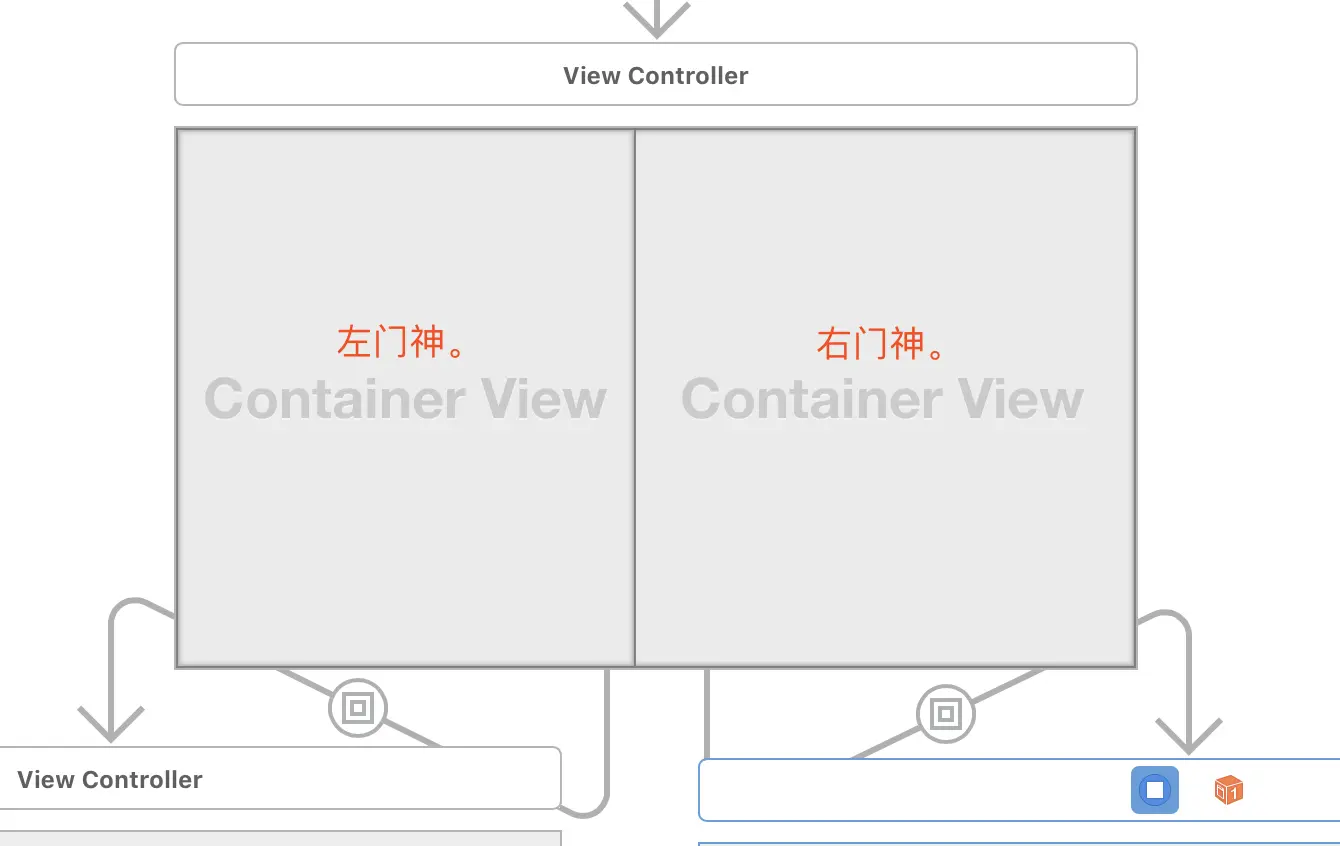
2、分别为两个Container View中添加Button和Label,并且设置Auto-Label。(不会的同学请参考第一篇文章)
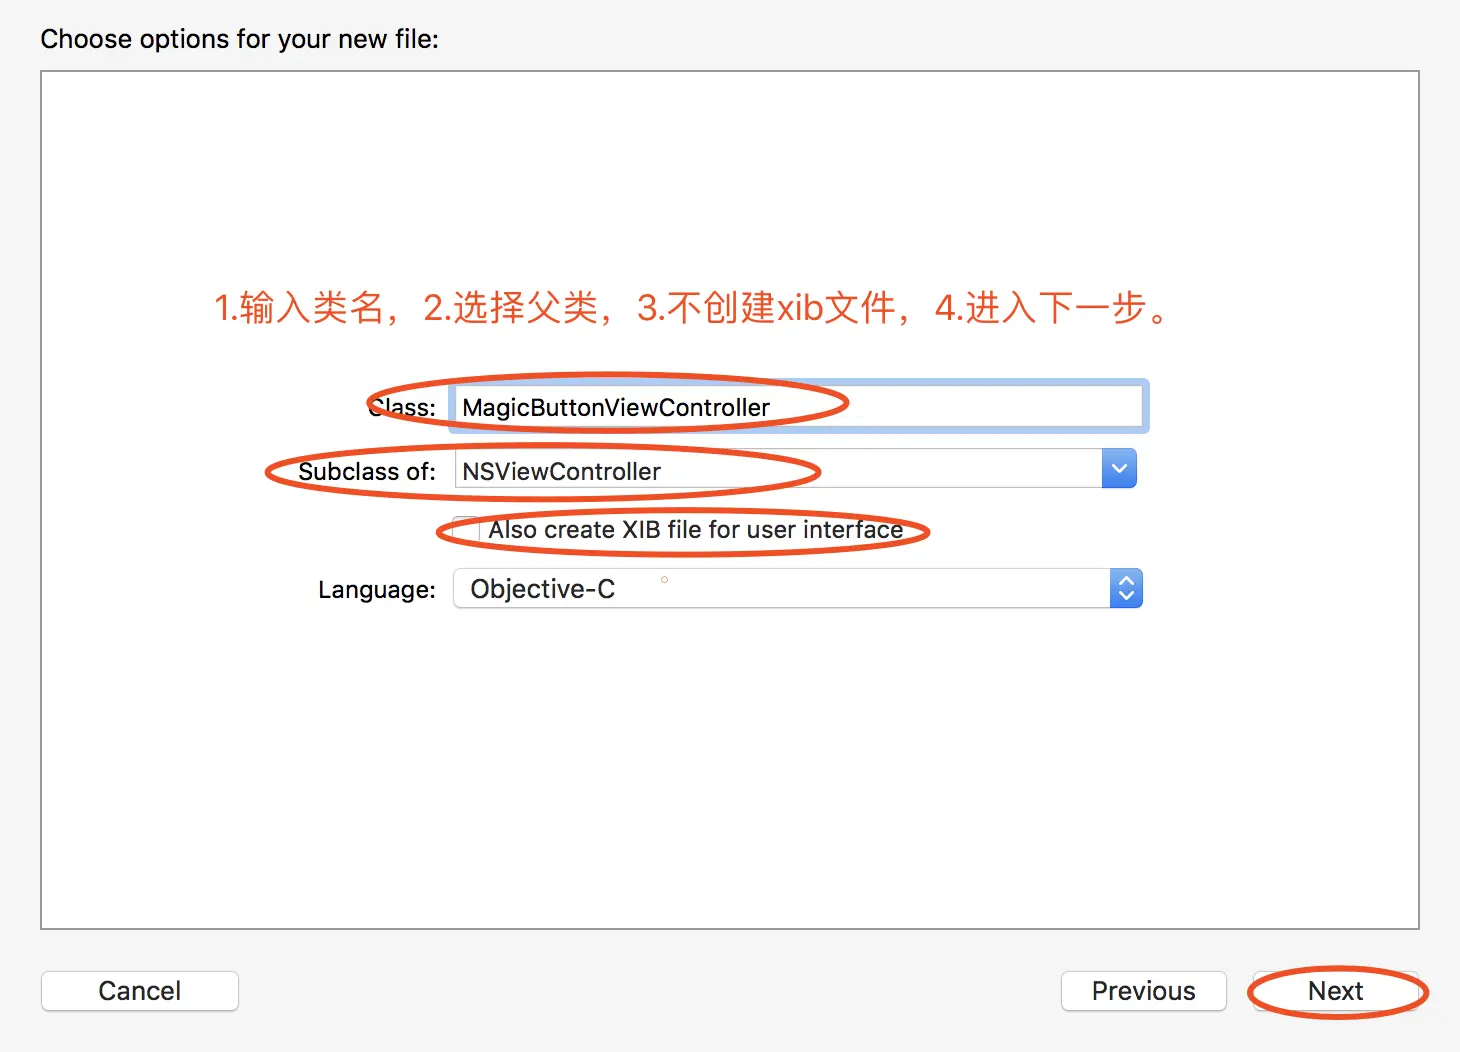
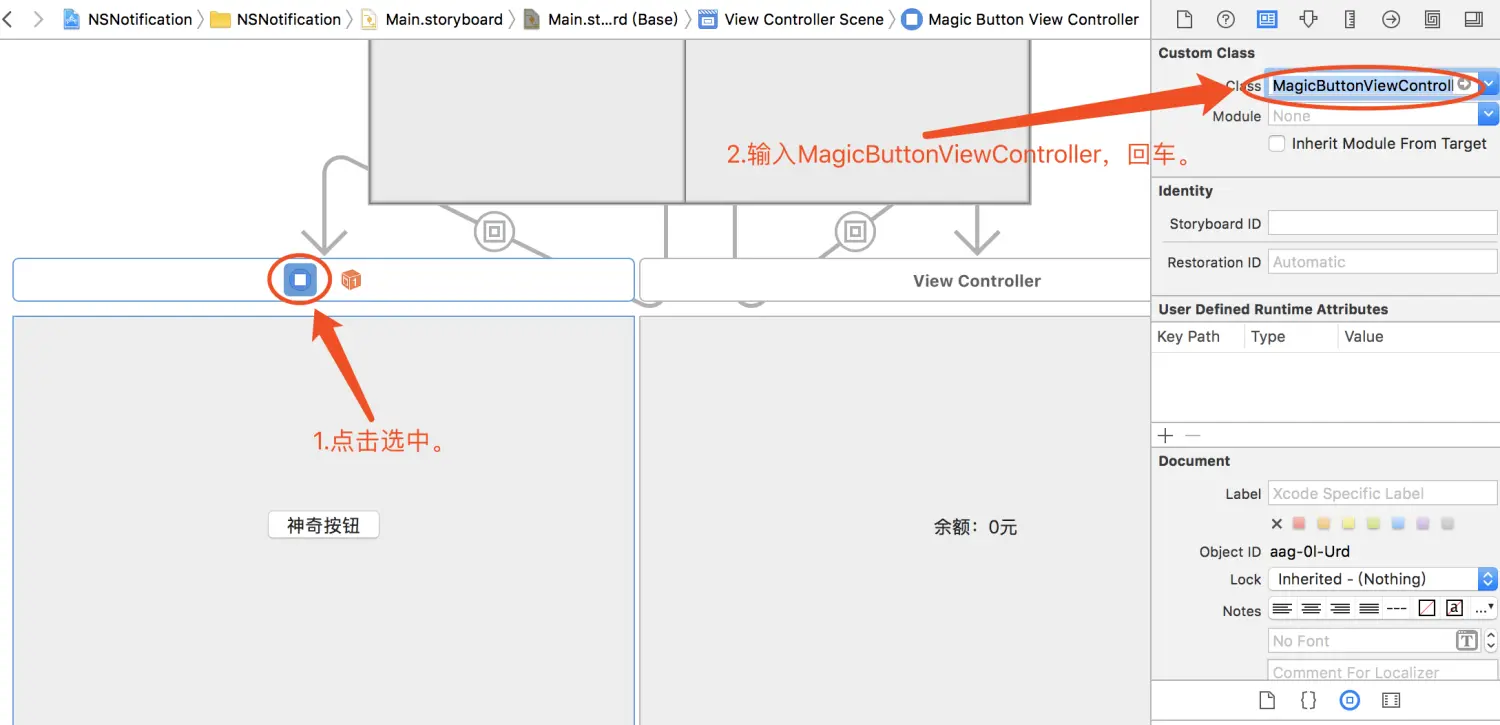
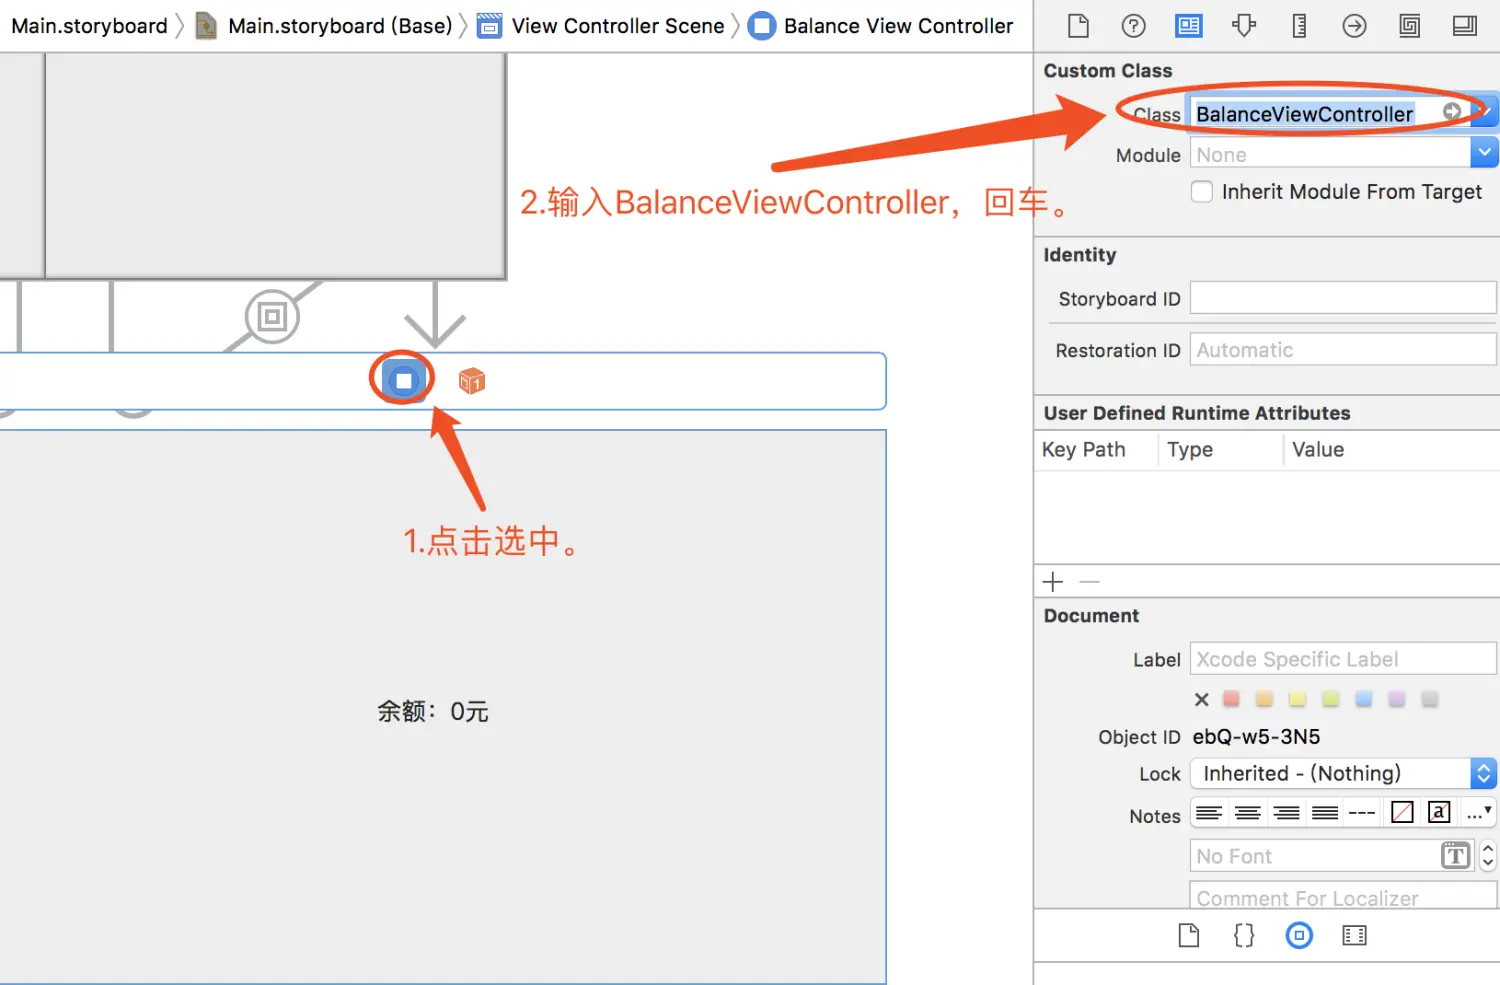
3、创建两个NSViewController的子类MagicButtonViewController和BalanceViewController
4.为Container View中的这两个View Controller添加Custom Class。
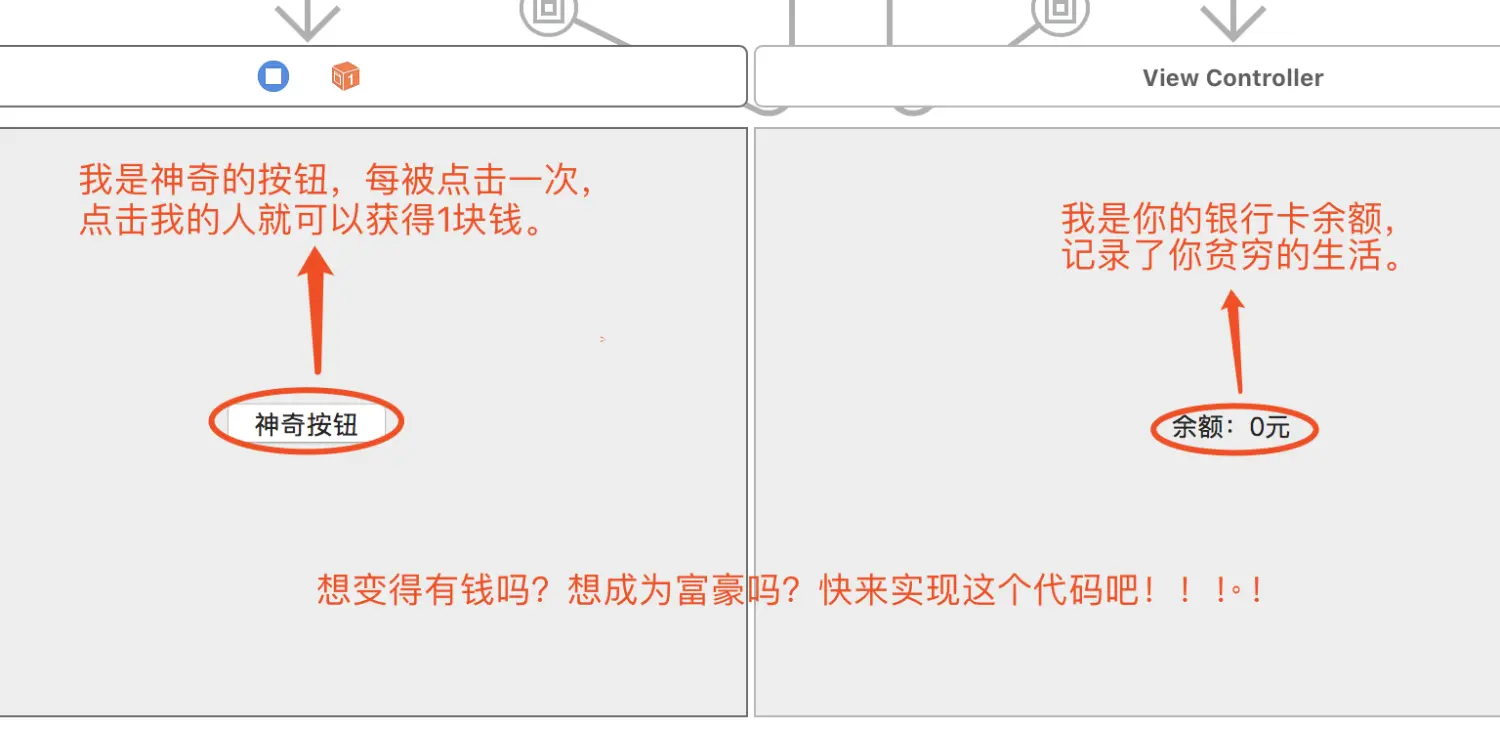
5.拖拽大法,将button拖拽至MagicButtonViewController.m中,将label拖拽至BalanceViewController.h中。
1
2
3
4
5
| //MagicButtonViewController.m
- (IBAction)btn_magic:(id)sender {
NSNotificationCenter *nc = [NSNotificationCenter defaultCenter];
[nc postNotificationName:@"click" object:self ];
}
|
1
2
3
4
5
| //BalanceViewController.h
#import <Cocoa/Cocoa.h>
@interface BalanceViewController : NSViewController
@property (weak) IBOutlet NSTextField *label_balance;
@end
|
1
2
3
4
5
6
7
8
9
10
11
12
13
14
15
16
17
18
19
20
21
22
23
24
25
26
| //BalanceViewController.m
#import "BalanceViewController.h"
@interface BalanceViewController ()
@property NSInteger balance; //余额
@end
@implementation BalanceViewController
- (void)viewDidLoad {
[super viewDidLoad];
// Do view setup here.
_balance = 0; //初始化为0
//监听、执行getCash方法
NSNotificationCenter *nf = [NSNotificationCenter defaultCenter];
[nf addObserver:self selector:@selector(getCash:) name:@"click" object:nil];
}
//getCash方法
- (void)getCash:(NSNotification*)notification{
++_balance;
_label_balance.stringValue = [NSString stringWithFormat:@"余额:%ld元",_balance];
}
@end
|
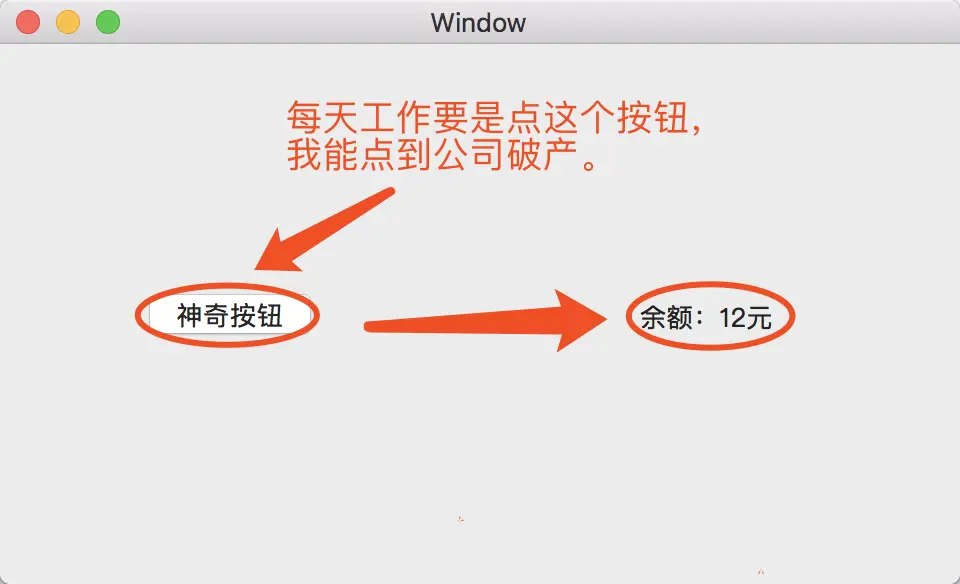
6.完成,效果如下。